Download Aerial Image data form EarthExplorer#
To download data from the EarthExplorer portal](https://earthexplorer.usgs.gov/) you first need to sign in. This is free and available to all but needed a couple of days to be processed. One you have created an account you could then :
manually download the data via the portal
automatically download the data with the machine-to-machine API
Create an account#
go to https://ers.cr.usgs.gov/register and fill the required username and password fields.
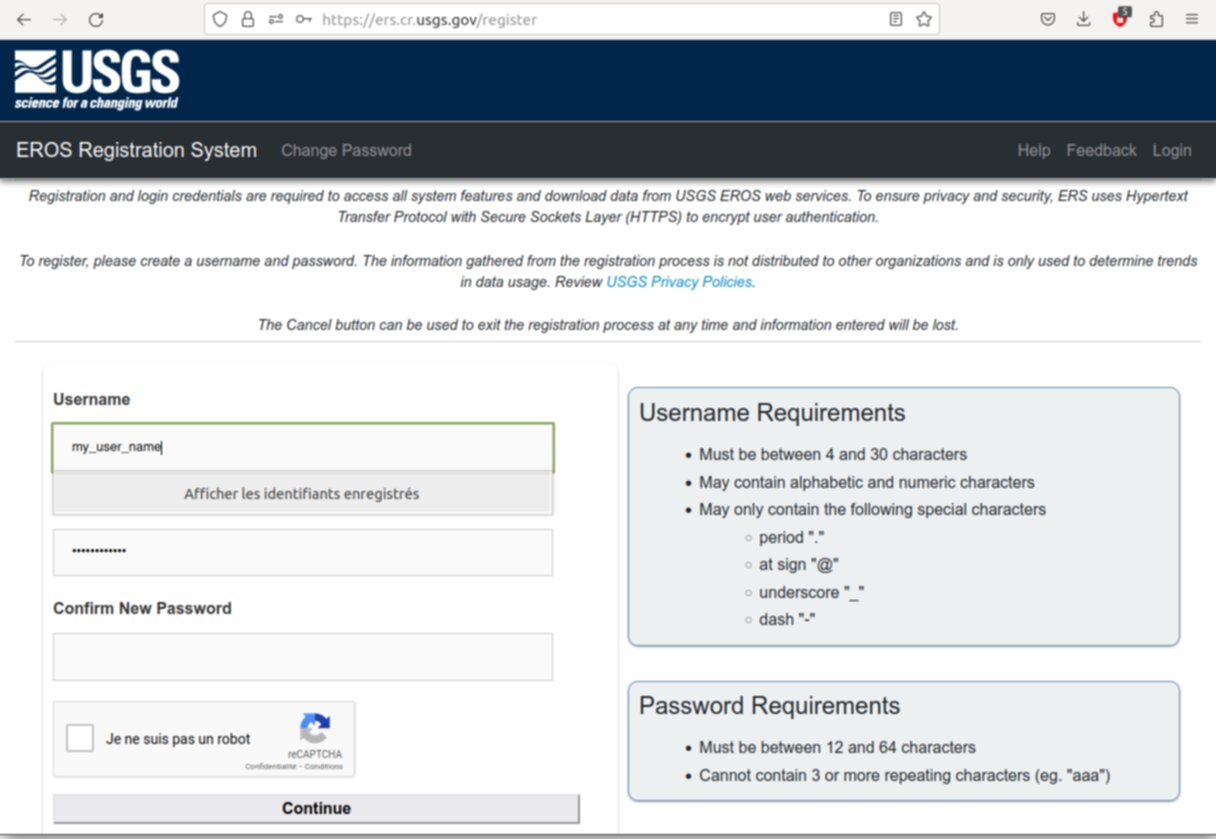
Fig. 1 Earth explorer account form !#
You should received by email the password one or two day after you have filled the account creation form.
Manual download instruction#
To illustrate the manual download instruction we will follow the steps need to download the data of the Bellingham area.
The global workflow that we will follow is :
Create a new EROS account at: https://ers.cr.usgs.gov/
Go to https://earthexplorer.usgs.gov/ and log in using your EROS account. This is a search tool to find imagery for a particular map area.
Find the area you want to cover with your tiles. It is helpful to draw out the coverage on the map with a polygon because EarthExplorer will return the images which match that coverage area.
Once an area is selected select bounding box, image type and year
Preview the images on the map using the image and coverage toggles. EarthExplorer will likely return different images from different data sets (often collected different years) depending on the location.
(Optional) Select the dataset corresponding to the imagery ou search (initial INRIA data for example).
Select the images that you want to use, and submit for bulk download. Alternatively, you can download them directly one by one.
Go to File -> Open Order and find the bulk download order you created.
Unzip the downloaded files (by default on my mac they were located inside the .app application directory)
Login to earthexplorer#
Go to EarthExplorer Portal. Then log in using your account.
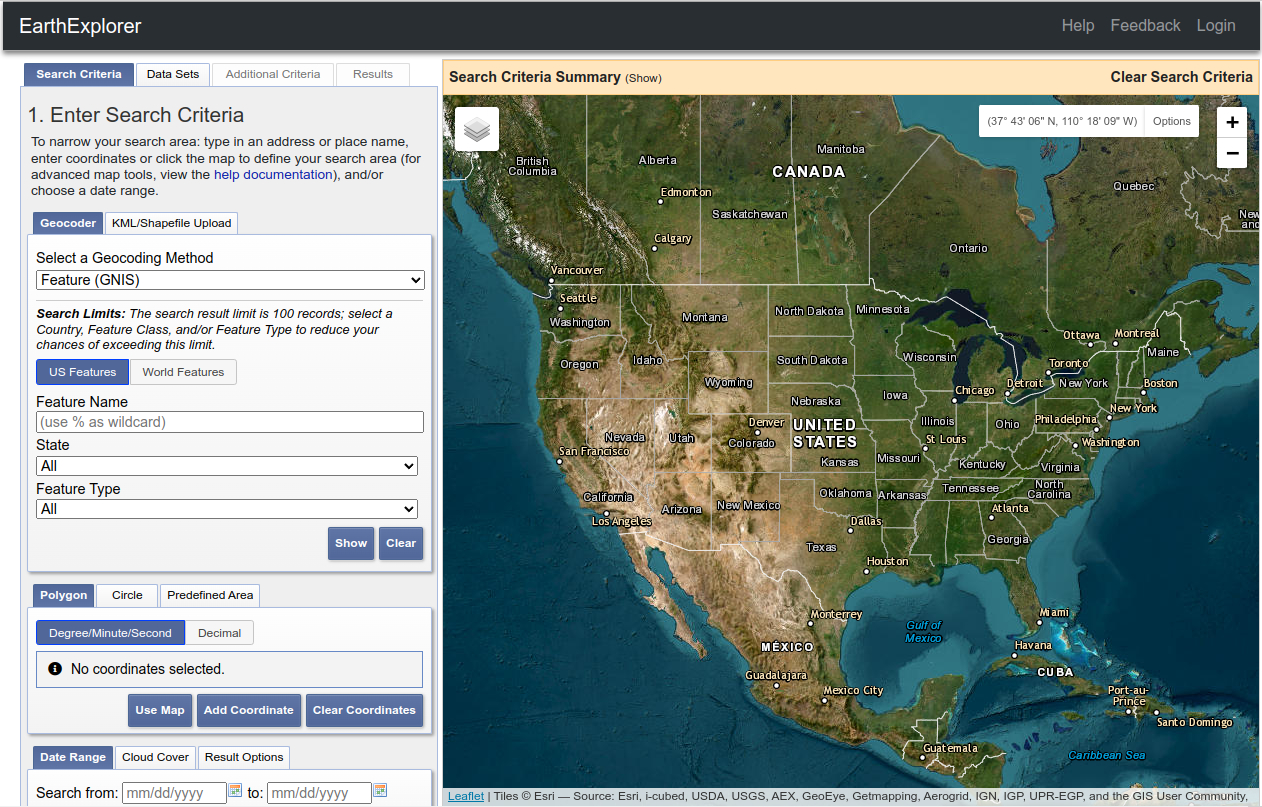
Zoom to Area#
We want to search for data in the area of Bellingham city, on Whatcom county, Washington State, USA. First we could find the approximate area by using the search “US Feature” option by setting :
Feature Name : Bellingham
State : Washington
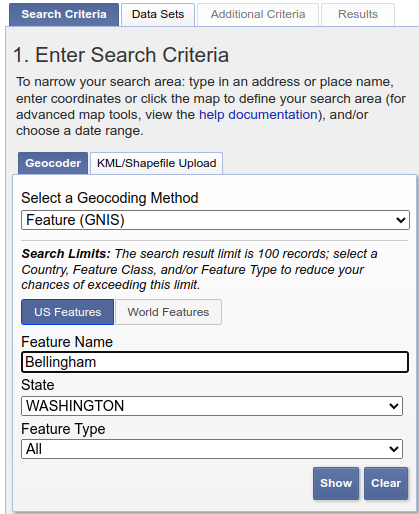
Then when cliking on th Show button. The corresponding found element are displayed
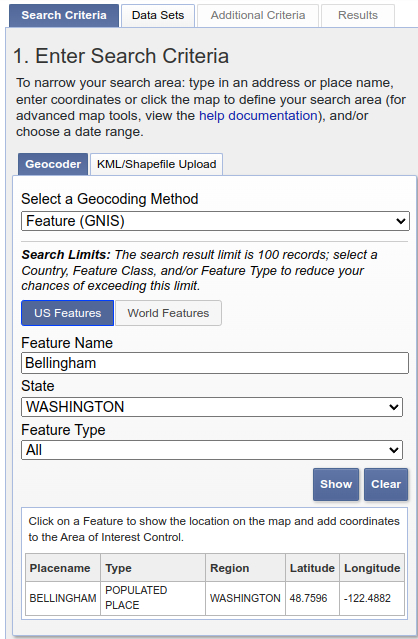
and when selecting/cliking on one result the corresponding geographical position is show with a blue pin and we could manually zoom to the area
Search and select data#
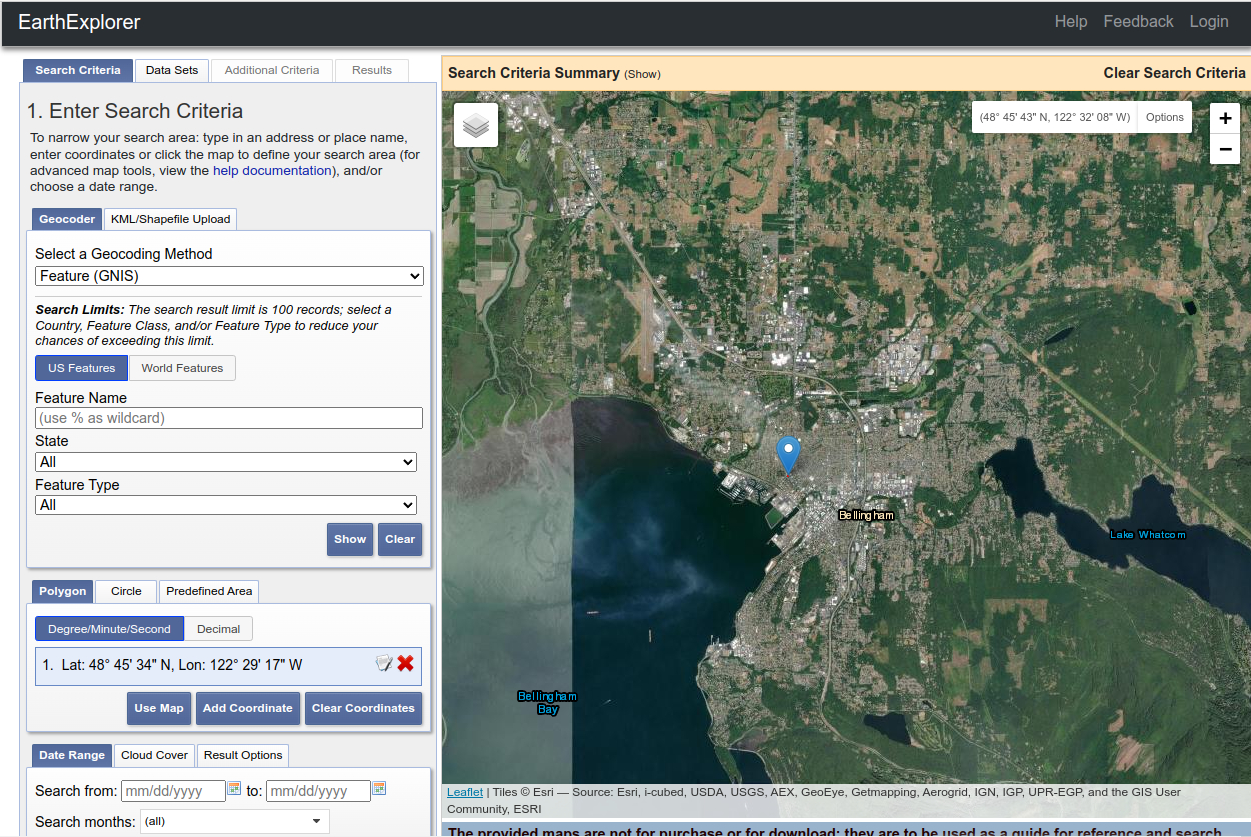
When you have zoom to the Bellingham area (town center) use the “Use Map” button (Polygon tab) to initialize the search area.
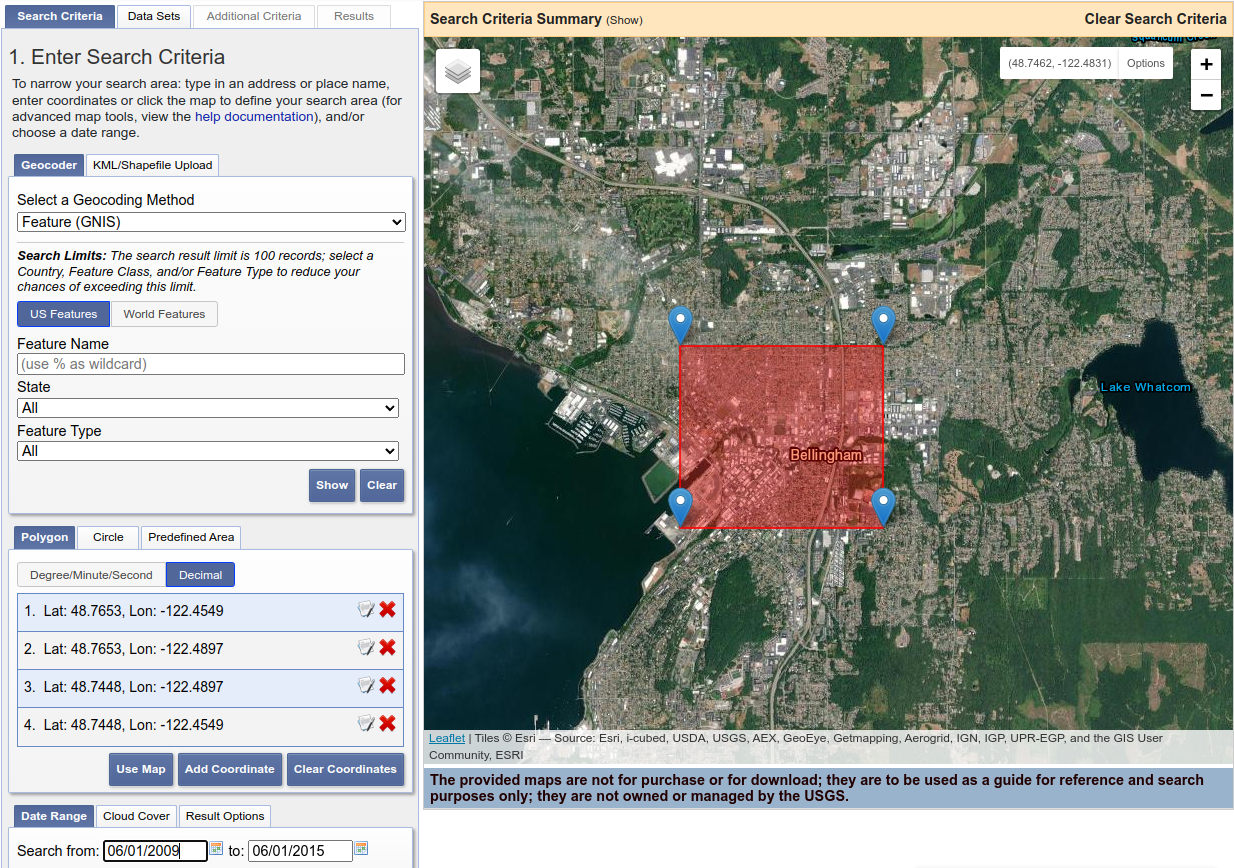
Fig. 2 Initial coordinate and geometry obtains with “use map” button#
Then you could modify the search area by displacing the pin corner or by editing the corner coordinate. The coordinate in lat / long WGS84 the Bellingham area use on Inria Dataset are
long : -122.518 / -122.374
lat : 48.6976 / 48.7925
So the corners are :
lat : 48.6976 ; long : -122.518
lat : 48.7925 ; long : -122.518
lat : 48.7925 ; long : -122.374
lat : 48.6976 ; long : -122.374
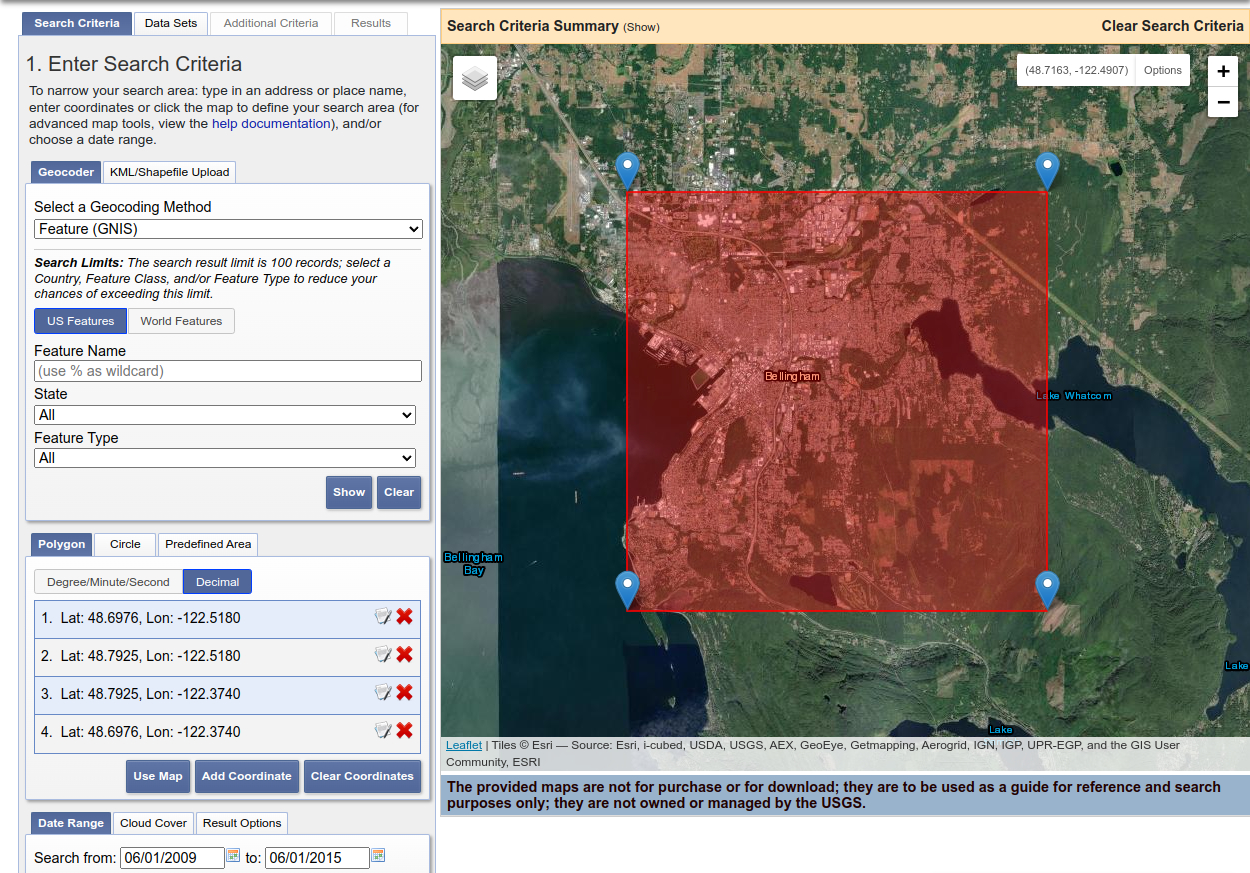
Fig. 3 Coordinates and geometry after manually editing them#
Then edit also the time interval for image acquisition between 01/01/2008 and 01/01/2015.

After that change the search tab to dataset and select only data from high resolution aerial imagery
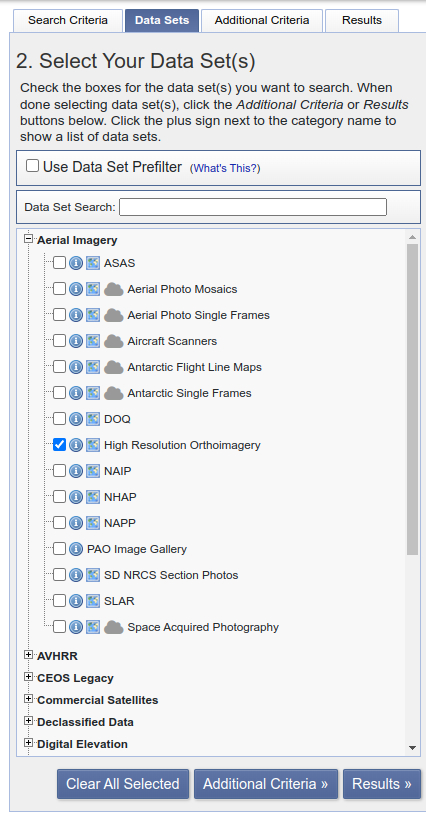
Then click on the result Button.
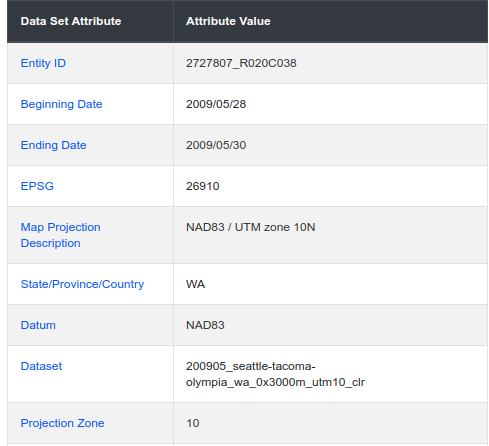
When filtering with time interval 01/01/2008 and 01/01/2015 by displaying and analysing the results (140) we could see that the aerial imagery belong to two differents missions. Comparing with the INRIA aerial imagery dataset we could see that the original data used by INRIA are the 2009 mission. We could then restrict the search to this specific data acquisition. First we could find the acquisition ID on the 2009 imagery metadatas. The dataset id is “Dataset 200905_seattle-tacoma-olympia_wa_0x3000m_utm10_clr”
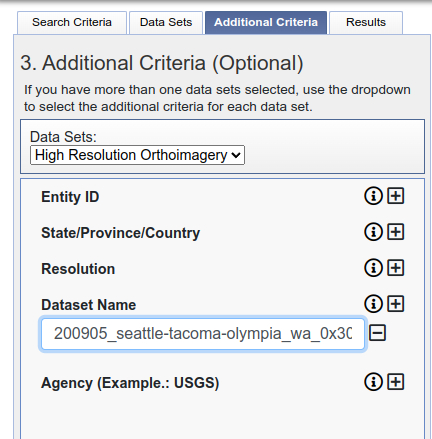
Next we use this information to restrict the search to this specific dataset by setting on the “Additional Criteria” tab the dataset name to “200905_seattle-tacoma-olympia_wa_0x3000m_utm10_clr”.
Select and download data#
The result should now be of only 64 aerial images. Select all the image for a bulk download
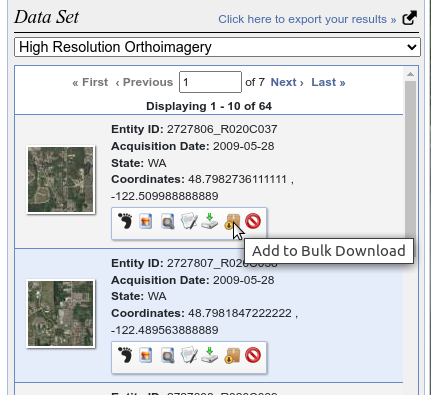
after selecting all of the 64 image click on the “Item Basket”. You could then begin a bulk download process.
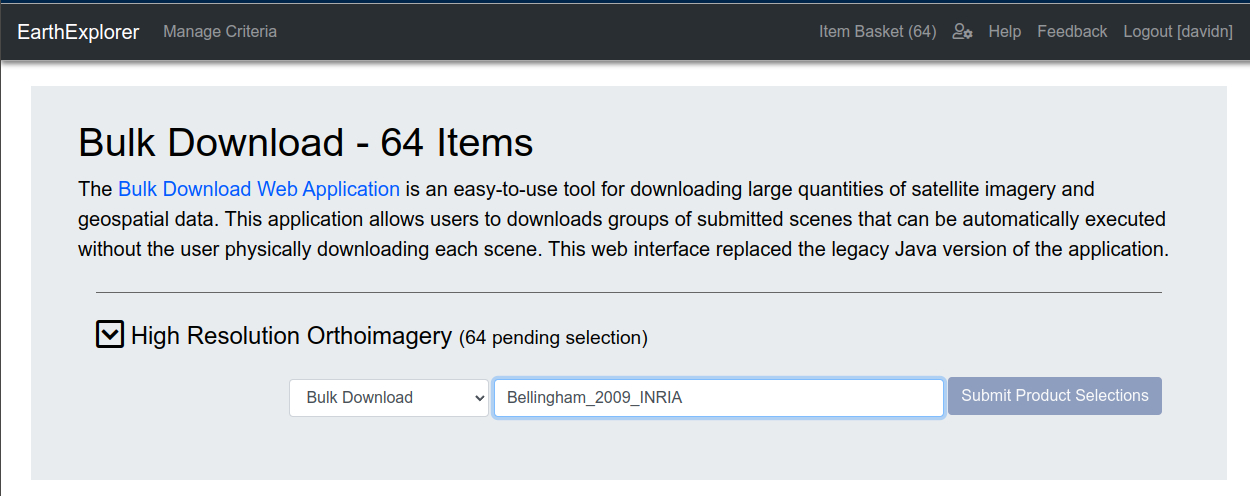
First click to unfold the pending selection
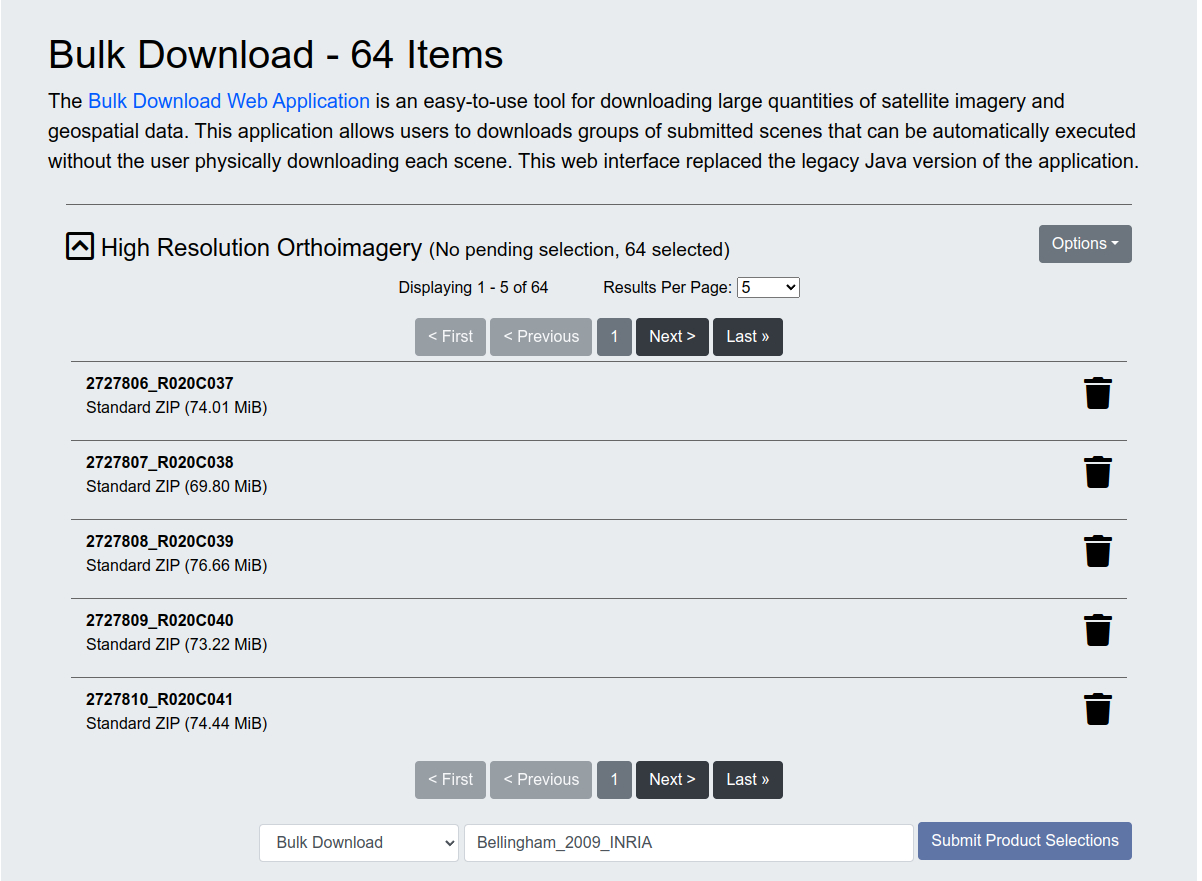
You should then see “No Pending Selection” and you could click on the “Submit product selection” which should be now enabled. If everything is ok you should see a notification that he bulk order has been correctly submitted.
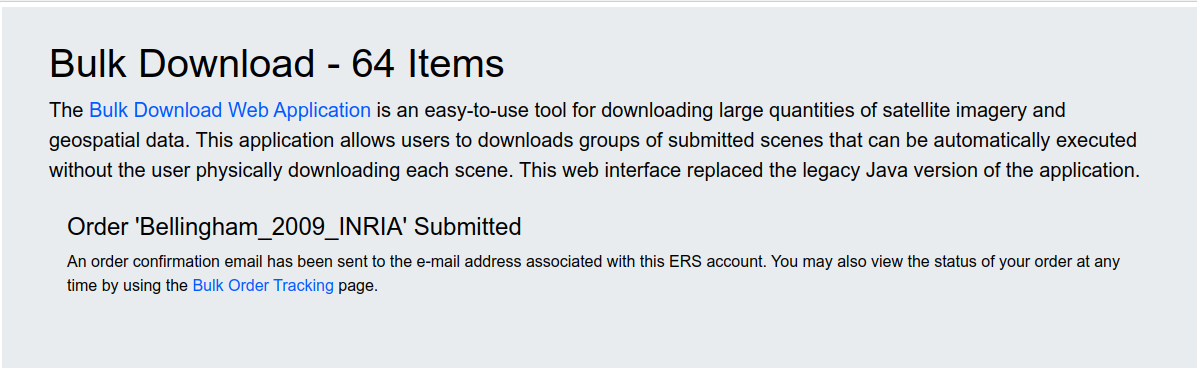
and you could follow the order processing on the bulk order tracking page
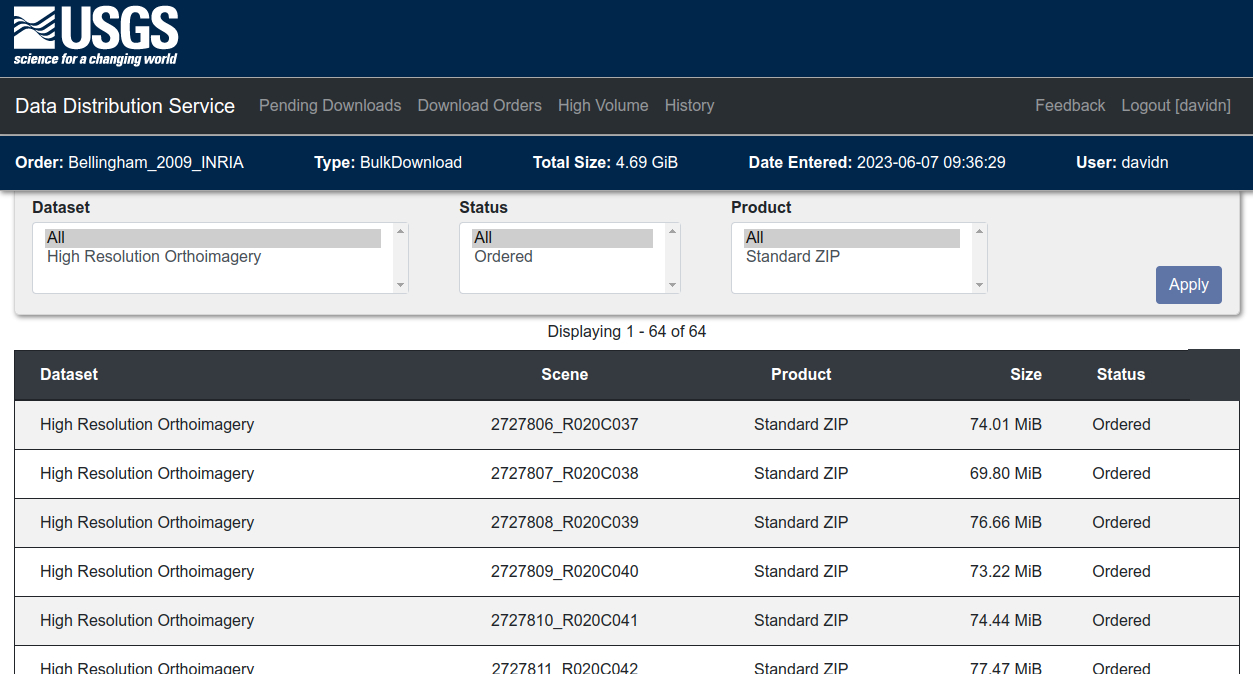
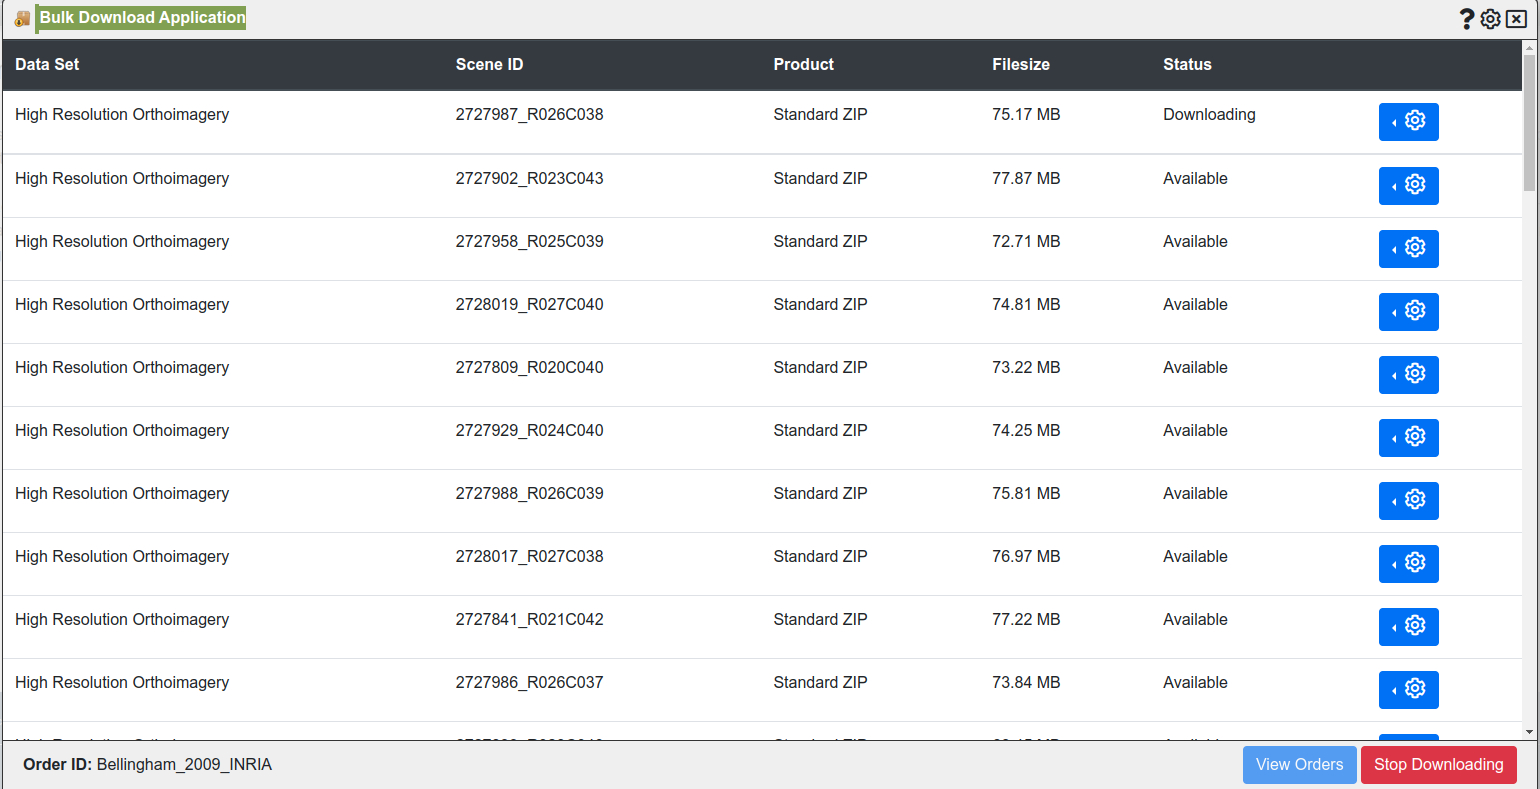
When you received the mail you could follow the provided link to the bulk donwload API with chromium or edge browsers.
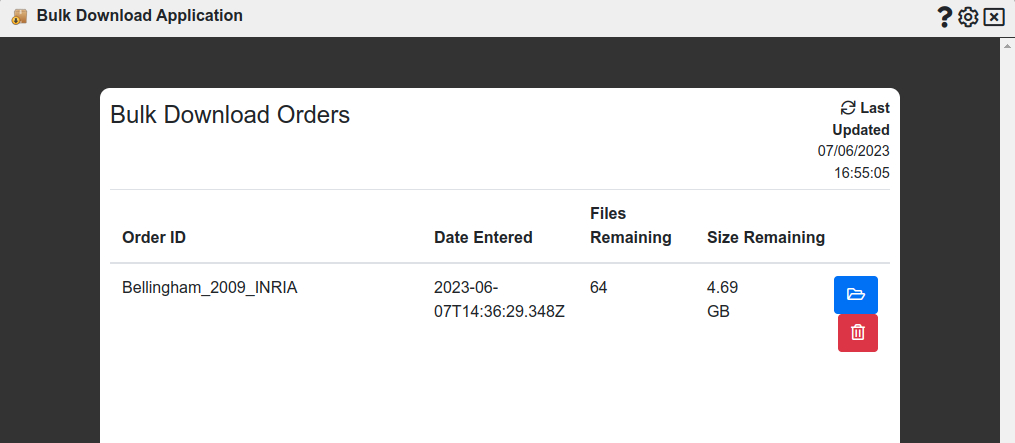
Then click on the blue button to process the download. You will be asked to choose a download directory. This must be a directory without any existing files. Then you will be prompted to accept that the API could see and modifiy the directory during the download process. Then you could launch the download when the data are marked as available (instead of queue) and follow the download progress.