Getting started#
Welcome to the getting started with EOTorchLoader tutorial!
This tutorial assumes you have already installed EOTorchLoader. For help with installation see our installation tutorial.
This tutorial will teach you all the more common way to use EOTorchLoader in you pytorch/pytorch lighningt training code. At the end of the tutorial you should be able to use EOTorchLoader for loading standard EO imagery in a pytroch deep learning training loop.
Get some EO data#
We first need some Earth Observation data, in this tutorial we will use two common benchmark dataset in remote sensing which are small to speed up a little this tutorial. Theses dataset are :
If you had not already download the data, use the following instruction :
The data could be donwloaded from the INIRA site or directly from terminal
mkdir -p EOData/INRIA
cd EOData/INRIA
curl -k https://files.inria.fr/aerialimagelabeling/getAerial.sh | bash
rm .7z.00*
the postdam data could be downloaded from the dedicated ISRPS page with password CjwcipT4-P8g
mkdir -p EOData/ISPRS/Potsdam
cd EOData/ISPRS/Potsdam
wget $(curl --silent https://seafile.projekt.uni-hannover.de/api2/f/429be50cc79d423ab6c4/ | tr -d '"')
unzip -j Potsdam.zip "Potsdam/4_Ortho_RGBIR.zip" -d .
unzip -j Potsdam.zip "Potsdam/5_Labels_all.zip" -d .
unzip 4_Ortho_RGBIR.zip
unzip 5_Labels_all.zip -d 5_Labels_all
Prepair dataframe with EO metadata#
In EOTorchLoader the path of image and mask data are set outside EoTorchLoader Datapipe and Datamodule and should be defined by the user. The prefered way for this is to construct a Pandas Dataframe with all informations for an (image, mask) sample on each row of the dataframe.
First we import pandas and some utils functions. EOTorchLoader has functions to help listing image metadata in a directory.
import pandas as pd
from eotorchloader.dataset.utils import load_geo_img_dir
Then depending of the dataset we prepair a dataframe with a row by image and at least somme columns with :
the path to the image file (ex: “img_path”)
the path to the ground truth/mask files (ex: “im_path”)
a column with train|val|test split (ex: “standard_split”)
Note
The split into train|val|test or kfolds is done at image level (row in dataframe) and not on the tile level. This is a choice made to avoid spatial correlation between folds.
The INRIA Aerial Image Labeling Dataset has the following structure :
.
├── test
│   └── images
└── train
     ├── gt
     └── images
Each image has a filename of type {town_prefix}{i}.tif with i in [1:36]. Gt (ground truth) and image has the same filename.
First we load info of train images with load_geo_img_dir utils function of EOTorchLoader
Then we define a split in train data between train and val dataset by setting val image as first images of each town. Usually for INRIA dataset val images are set as the 6 first image of each towns.
# first get images geo metadata
inria_dataset_root_dir = Path("/path/to/your/EOData/INRIA/AerialImageDataset")
inria_train_val_df = load_geo_img_dir(inria_dataset_root_dir/"train"/"images")

# Then add a columns for the train|val split
# This is done by splitting the name string values (as "tyrol-w28") in 2 parts :
#    - a name with alphabetic character ("tyrol-w")
#    - and a id/num with numerical values (28)
inria_train_val_df[['town', 'num']] = inria_train_val_df["name"].str.extract(
    '([a-zA-Z\-]+)([^a-zA-Z\-]+)', expand=True)
# convert num from string to int
inria_train_val_df['num'] = inria_train_val_df['num'].astype(int)

# Next we add standard_split columns
# first initialize all row with train
inria_train_val_df["standard_split"] = "train"
# set all row/image with num < 6 as validation data
inria_train_val_df.loc[inria_train_val_df["num"]<=6 ,"standard_split"] = "val"

# finally we rename 'path' as 'img_path' and add
# a 'gt_path' columns with corresponding mask path
inria_train_val_df = inria_train_val_df.rename(columns={"path": "img_path"})
inria_train_val_df["msk_path"] =  inria_train_val_df["img_path"].str.replace(
    "images", "gt", regex=False)
Todo
# TODO
Initialize a training dataset#
Once we have the list of image and mask on a dataframe, we could intialize a custom torch.dataset doing online image tiling
First import EOTorchLoader dataset
# import for use in train code
from eotorchloader.dataset.scene_dataset import LargeImageDataset
Then initialize the dataset.
to init the train dataset
inria_train_df = inria_train_val_df[
     inria_train_val_df["standard_split"]=="train"]
image_files_train = inria_train_df["img_path"].values
mask_files_train = inria_train_df["msk_path"].values

train_dataset_tile = LargeImageDataset(
     image_files=image_files_train,
     mask_files=mask_files_train,
     tile_size = 512,
     transforms=None,
     image_bands=[1,2,3],
     mask_bands=[1])
Todo
Check that we have a sample with correct dict format and array shape :
import numpy as np
test_idx = 201
test_data = train_dataset_tile[test_idx]
print(f" keys : {test_data.keys()}")
img_shape =  test_data['image'].shape
msk_shape = test_data['mask'].shape
print(f" image shape : {img_shape}, mask shape : {msk_shape}")
print(f" mask type : {test_data['mask'].dtype}")
Note
the tile_size is set in pixel
by default no transform is apply and the sample are in form
{
  "image" : np.array,
  "mask" :np.array
}
image and mask array are in channel first order (CHW or rasterio like)
Use samples transforms#
EOTorchLoader dataset made no assertion considering the formatting of training data. So, to convert raw input data into pytorch compatible training sample one must define the dedicated transforms (datapipe).
Must of the time input data should be scale to [0 - 1] range and convert to float. Common EO transforms are available in eotorchloader.transform
Import commons transforms for format EO training data
from eotorchloader.transform.scale import ScaleImageToFloat
from eotorchloader.transform.tensor import ToTorchTensor
Inria input data are :
on RVB uint8 format for image and should transform to RVB float [0-1] range
on grayscale uint8 format for mask data. With 0 == nobuilding and 255 == building. We transfom this also into float tensor between [0-1] range with 1.0 == building.
inria_train_tf = [
   ScaleImageToFloat(scale_factor=255, clip=True, img_only=False),
   ToTorchTensor()
]

train_dataset_tile_b = LargeImageDataset(
   image_files=image_files_train,
   mask_files=mask_files_train,
   tile_size = 384,
   transforms=inria_train_tf,
   image_bands=[1,2,3],
   mask_bands=[1]
Todo
We could see that the sample is now compose of pytorch float Tensor with value between [0-1]. The following tests
test_idx = 240
test_data = train_dataset_tile_b[test_idx]
print(f" keys : {test_data.keys()}")
img_shape =  test_data['image'].shape
msk_shape = test_data['mask'].shape
print(f" image shape : {img_shape}, mask shape : {msk_shape}")
print(f" mask type : {test_data['mask'].dtype}")
should display :
keys : dict_keys(['image', 'mask'])
image shape : torch.Size([3, 384, 384]), mask shape : torch.Size([1, 384, 384])
mask type : torch.float32
image min 0.0 max : 0.992
mask histogram torch.return_types.histogram(
hist=tensor([144520.,      0.,      0.,      0.,      0.,      0.,      0.,      0.,
            0.,      0.,   2936.]),
bin_edges=tensor([0.0000, 0.0909, 0.1818, 0.2727, 0.3636, 0.4545, 0.5455, 0.6364, 0.7273,
      0.8182, 0.9091, 1.0000]))
Display samples/patch#
Transforms could also be used to display samples whith standard python plotting libraries. For example when using matplotlib images should be in channel last order and 3 channels mean RVB data.
To avoid defining a dedicated Dataset to plot samples, display transforms are also use inside display function (and after the dataset transforms)
EOTorchLoader has some already define function and transform for displaying EO (and land cover) sample data
Import display functions
from eotorchloader.transform.display import ToRgbDisplay
from eotorchloader.transform.tensor import CHW_to_HWC
from eotorchloader.display.matplotlib import view_patch, view_batch
To display data with matplotlib we should :
convert image data from channel first order (CHW) to channel last order (HWC)
convert mask/grayscale image to RVB data with a colormap/lut table.
Inria input data are on grayscale uint8 format for mask data. With 0 == nobuilding and 255 == building. We convert this values to some RVB color with a LUT of shape (4, 2)
inria_lut = np.array([
   [  0, 255,  255, 255], # white
   [  255, 255, 50, 150]  # pink
])
display_patch_transform = ToRgbDisplay(lut=inria_lut, flatten_mask=False)
Next we add a CHW to HWC transform before the ToRgbDisplay transform.
channel_last_transform = CHW_to_HWC(img_only=True)
display_tf_list= [
   channel_last_transform,
   display_patch_transform]
And finally we call the view_patch function
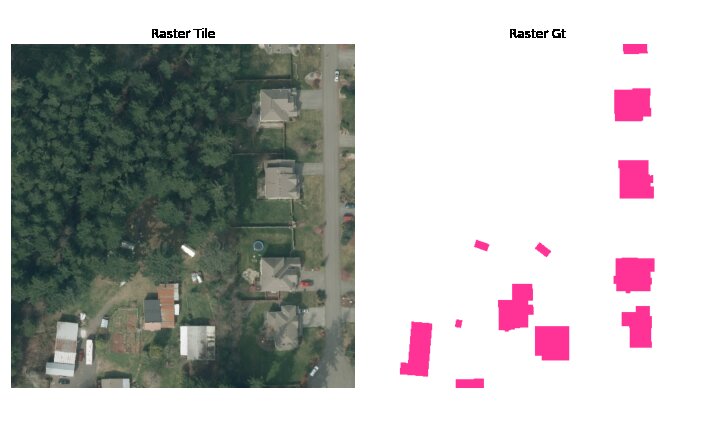
test_data = train_dataset_tile[142]
view_patch(test_data, transforms=display_tf_list)
To display the same tensor as the ones use on training input, or to display val/prediction results we need to had two additionals tranforms before the last display transforms :
a transform to convert from pytorch tensor to numpy
a transform to pass from [0-1] float image to [0-255] Bytes. (depend on plotting backend)
from eotorchloader.transform.scale import FloatImageToByte
from eotorchloader.transform.tensor import TensorToArray, CHW_to_HWC
display_b_tf_list= [
   TensorToArray(),
   FloatImageToByte(clip=True, img_only=False),
   channel_last_transform,
   display_patch_transform]
test_data = train_dataset_tile_b[144]
view_patch(test_data, transforms=display_b_tf_list)
Dataloader and datamodule#
EoTorchLoader dataset could also be use with pytorch Dataloader or pytroch lightning datamodule.
Dataloader#
Using it with a pytroch dataloader is simple and follow the standard dataset/dataloader code.
from torch.utils.data import DataLoader
inria_train_dataloader = DataLoader(train_dataset_tile_b, batch_size=4, num_workers=4)
then the dataloader could be use in your training loop
from tqdm import tqdm

with tqdm(
   total=len(inria_train_dataloader), desc=f"patch Image loader",
   bar_format='{l_bar}{bar}| {n_fmt}/{total_fmt} [{elapsed}]') as pbar:

   for sample in inria_train_dataloader:
      images = sample['image']
      masks = sample['mask']
      # DO SOMETHING TO TRAIN THE MODEL ..
      pbar.update(1)
eotorchloader offer also basic display function to display batch of data
from eotorchloader.display.matplotlib import view_patch, view_batch
test_batch = next(iter(inria_train_dataloader))
view_batch(test_batch, size = 4, transforms = display_b_tf_list)

Lightning datamodule#
Warning
this part is still in work in progress and mainly support for internal TerrIa project.
When using datapipe and dataloader in pytorch it’s common to have a datapipe (or dataset) and associated dataloader for each of the train|val|test part of the data. Pytorch lightning offer a datamodule API which ease the manipulation of this three associated dataloader in one class.
Eotrochloader has dedicated daamodule to made use of gegraphical fold more simple.
First import the eotorchloader datamodule
from eotorchloader.datamodule.terria import TerriaDataModule
Then write a dictionnary with the fold structure of your data.
Note
as test ground truth is not available for INRIA dataset we test datamodule functionnality in kfold mode with a fold by town in the train data.
The INRIA train data are available on 5 distinct geographical area whith 36 images in each area.
inria_train_df["town"].unique()
[‘tyrol-w’, ‘chicago’, ‘kitsap’, ‘vienna’, ‘austin’]
We define a kfold split with 3 town in train, 1 in val and 1 in test. Here it’s manually define but one could automatize this part with some scikit-learn kfold functions.
fold_config = {
   "set_1" : {
      "train" : ['kitsap', 'vienna', 'austin'],
      "val" : ['chicago'],
      "test" : ['tyrol-w'] },
   "set_2" : {
      "train" : ['vienna', 'austin', 'tyrol-w'],
      "val" : ['kitsap'],
      "test" : ['chicago'] },
   "set_3" : {
      "train" : ['austin', 'tyrol-w', 'chicago'],
      "val" : ['vienna'],
      "test" : ['kitsap'] },
   "set_4" : {
      "train" : ['tyrol-w', 'chicago', 'kitsap'],
      "val" : ['austin'],
      "test" : ['vienna'] },
   "set_5" : {
      "train" : ['chicago', 'kitsap', 'vienna'],
      "val" : ['tyrol-w'],
      "test" : ['austin']
}
Then we use the fold config to initialize a datamodule with the set we want to use in our training
kfold_datamodule_3 = TerriaDataModule(
   inria_train_df,
   transforms = inria_train_tf,
   img_col = "img_path",
   img_bands = [1,2,3],
   mask_col = "msk_path",
   mask_bands = [1],
   group_col = "town",
   set_config = fold_config["fold_3"],
   tile_size=512,
   batch_size=4)
And it could be used as standard pytorch lightning module. For exemple to display a batch of training data :
kfold_datamodule_3.setup()
pl_train_loader = kfold_datamodule_3.train_dataloader()
test_batch = next(iter(pl_train_loader))
view_batch(test_batch, size = 4, transforms = display_b_tf_list)